> For the complete documentation index, see [llms.txt](https://help.adalo.com/llms.txt). Markdown versions of documentation pages are available by appending `.md` to page URLs; this page is available as [Markdown](https://help.adalo.com/actions/notifications/scheduled-notifications/manage-scheduled-notifications.md).
# Manage Scheduled Notifications
This guide covers how to let users view and cancel recurring notifications. You'll create interfaces where users can manage all their scheduled notifications and delete ones they no longer need.
***
*Skill Level: Intermediate*
### Before You Begin
Before setting up notification management, you should have already:
* Created and scheduled notifications
* Store the Notification Job ID in your Adalo Database
* Set up notification permissions
***
## Display Notifications to Users
Users need to see what notifications are scheduled for their records.
#### Add a Notifications List
In your app, add a list component that shows all notifications and filter to show only notifications for the current related record or user.
#### Make Notifications Actionable
Make the list items tappable so users can click a notification to see details and manage it.
***
### Create a Notification Details Screen
When a user taps a notification, navigate them to a details screen where they can see more information and manage it.
#### Design the Details Screen
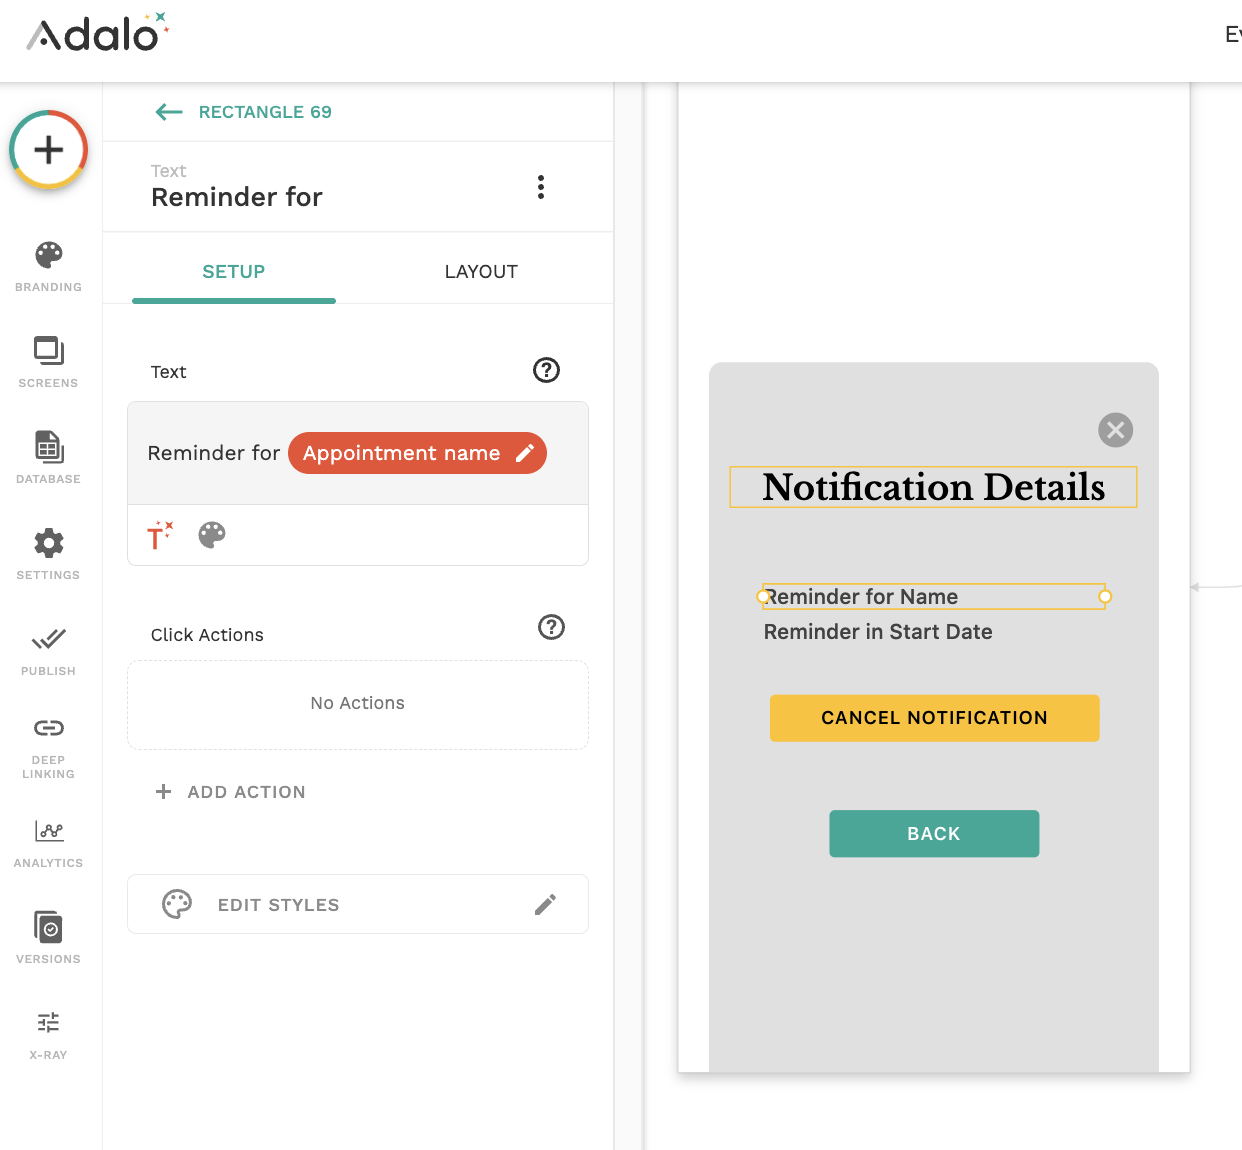
Create a simple screen with:
* **Back button** for navigation
* **Notification information** (what it's about, when it will send)
* **Action buttons** (cancel notification, reschedule, etc.)
#### Display Notification Details
Show the scheduled date and time clearly so users know exactly when the notification will arrive:
## Cancel Notifications
Users should be able to cancel notifications they no longer want.
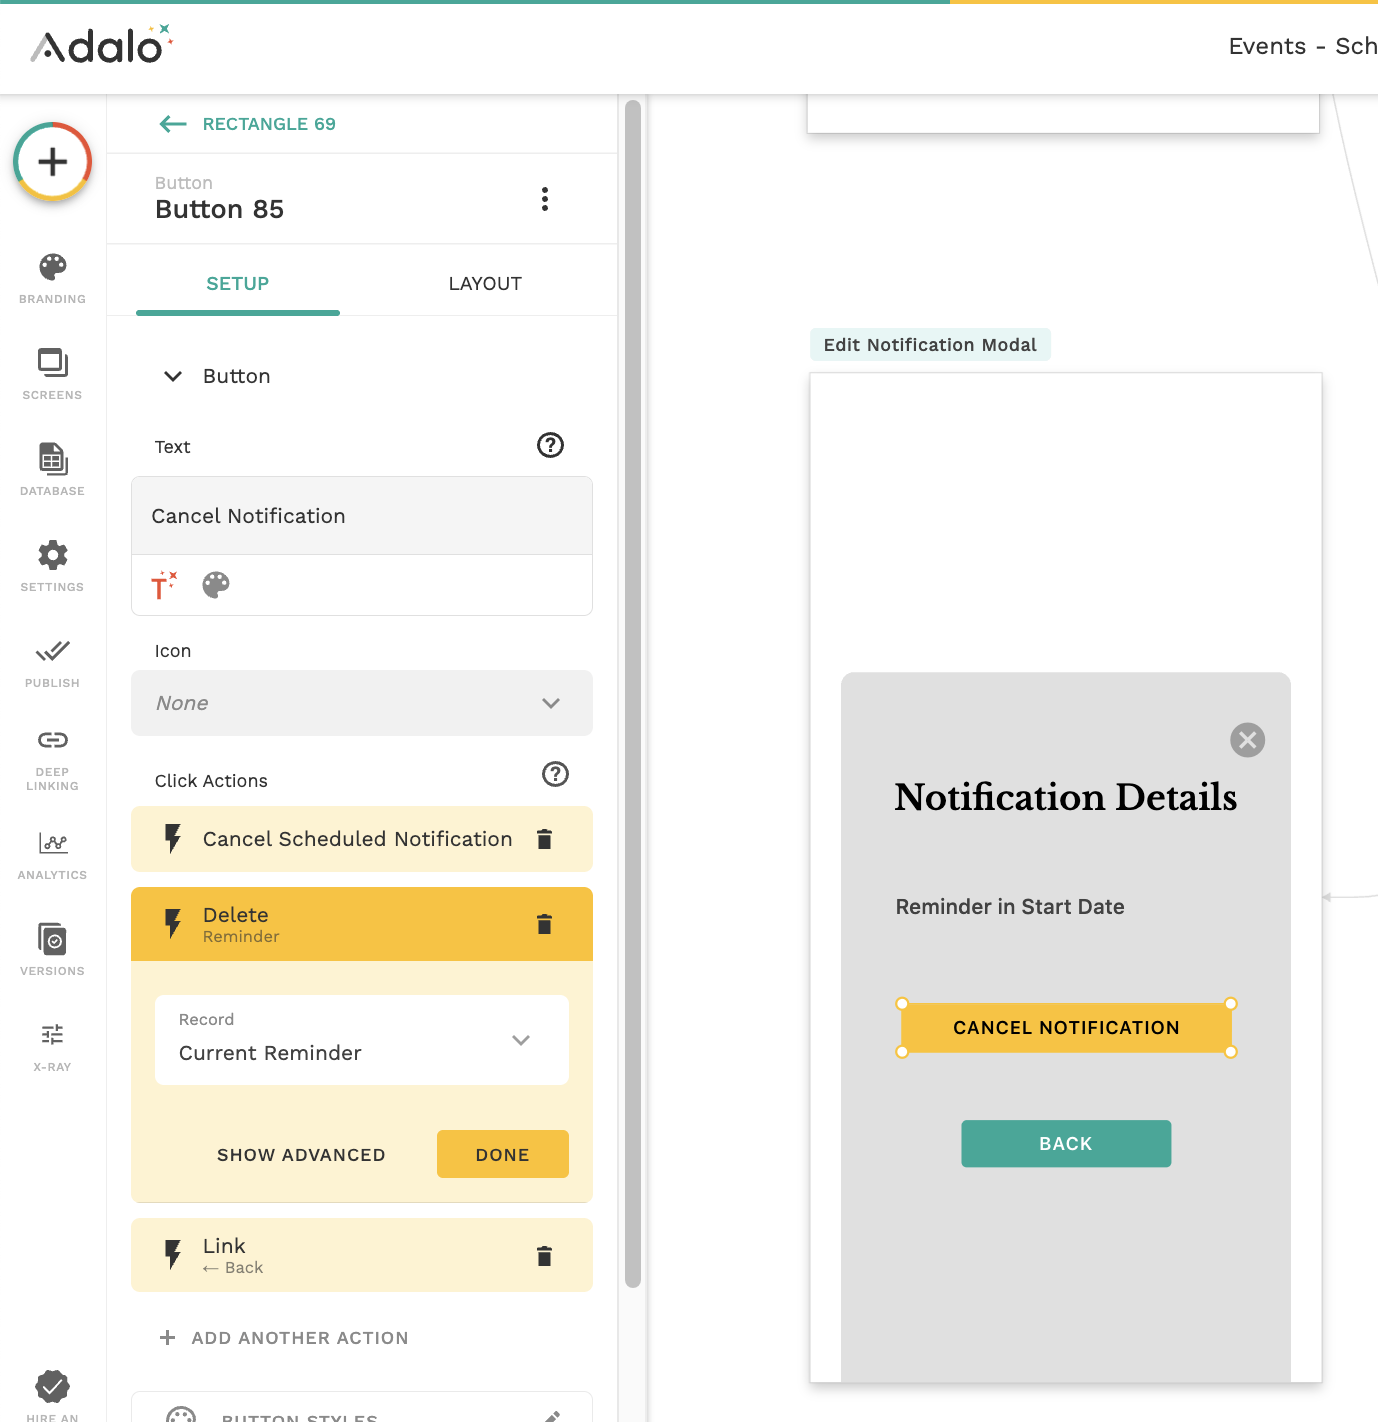
#### The Two-Action Cancellation Pattern
{% hint style="warning" %}
**Action order is critical.** You must cancel the notification ***BEFORE*** deleting the record. If you delete first, the Job ID becomes inaccessible and you can't cancel the notification.
{% endhint %}
#### Cancel the Scheduled Notification
Add a **Cancel Scheduled Notification** action:
* **Notification ID:** Current Notification > Notification Job ID
This removes the notification from Adalo's queue so it won't be sent.
#### Delete the Notification Record
Add a **Delete** action immediately after:
* **Record:** Current Notification
*
This removes the notification from your database so it no longer appears in lists.
**Why delete the record?** If you only cancel the notification but leave the record, users will still see it in their notification list, which is confusing.
### Best Practices for Managing Notifications
* **Always cancel before deleting** – This is critical. Cancel the notification first, then delete the record. Reversing this will result in the JobID being deleted before the notification is cancelled.
* **Store Job ID immediately** – Capture it right after scheduling. You need it for any future management.
* **Set clear end dates** – For recurring notifications, always specify when they should stop (usually the main record's date).
* **Provide good UX feedback** – After canceling, navigate users back to a list so they see the change immediately.
* **Test recurrence early** – Recurring notifications with date calculations can be complex. Test with data scheduled soon.
* **Consider timezone handling** – If you serve multiple regions, test how timezones affect scheduling and recurring patterns.
* **Make actions obvious** – In your UI, make it clear what action will happen (e.g., "Cancel Notification" not just "Cancel").
* **Allow easy management** – Don't hide notification management. Put it on the main detail screen where users expect it.
---
# Agent Instructions
This documentation is published with GitBook. GitBook is the documentation platform designed so that both humans and AI agents can read, navigate, and reason over technical content effectively. Learn more at gitbook.com.
## Querying This Documentation
If you need additional information that is not directly available in this page, you can query the documentation by asking a question.
Perform an HTTP GET request on the following URL with the `ask` and `goal` query parameters:
```
GET https://help.adalo.com/actions/notifications/scheduled-notifications/manage-scheduled-notifications.md?ask=&goal=
```
`ask` is the immediate question: it should be specific, self-contained, and written in natural language.
`goal` is what the user is ultimately trying to achieve, the reason they need the answer. Sharing it helps GitBook give you a better, more relevant answer. A goal is most helpful when it describes the outcome the user wants rather than restating the question. For example, with `ask=how do I create an API token`, a goal like `automate deployments from our CI pipeline` lets GitBook tailor the answer to that use case.
The response will contain a direct answer to the question and relevant excerpts and sources from the documentation.
Use this mechanism when the answer is not explicitly present in the current page, you need clarification or additional context, or you want to retrieve related documentation sections.